Finding and installing Heating, Ventilation, Air Conditioning & Refrigeration (HVAC&R) applications for high-pressure systems has become more difficult as international regulations have eliminated some common refrigerants. R22, for example, is set to become illegal on January 1, 2020, due to its high global warming potential (GWP). With this in mind, the industry has begun developing sustainable, durable tubing materials.
Some copper tubing designated for HVAC&R applications does not provide the wall thicknesses necessary to handle the temperatures and pressures of carbon dioxide systems. However, copper-iron (C19400) material offers high strength, good thermal conductivity, and great workability, making it an exceptional, sustainable tubing option for HVAC&R applications. The C19400 alloy is rated for pressures in the range of 90 bar (1,305 psi) to 130 Bar (1,885 psi) and above at operating temperatures up to 300°F, compatible with the operating ranges of CO2 refrigeration systems.
Installation Details:
Brazing techniques for copper-iron alloy are the same as those for brazed joints in standard copper and copper alloy systems for plumbing, HVACR, medical gas and other systems that require strong, leak-free, fatigue-resistant joints.
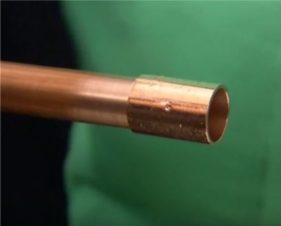
- First, measure the copper iron alloy tube accurately and precisely, so it will completely fill the socket when inserted into the fitting.
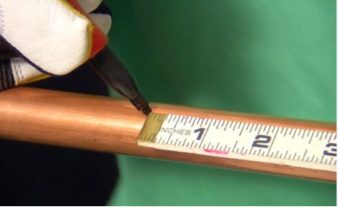
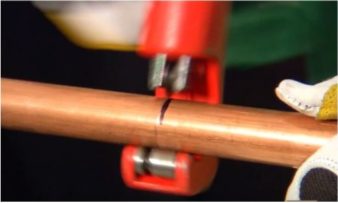
- Cut the tube square to the desired length.

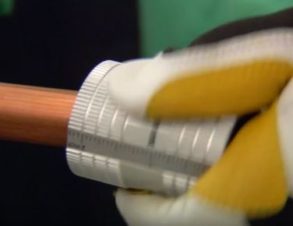
- Deburr the inside edge of the tube and chamfer the outside edge.
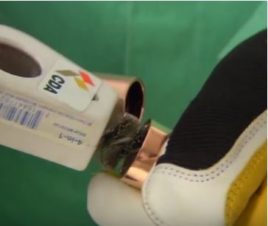
- Clean the outside of the tube and inside of the fitting cup(s) to ensure the surfaces to be brazed are free from dirt, oxides or other contaminants that can impede the flow of filler metal into the joint.
When joining copper-iron tubing/fittings to each other, brazing flux is not required and brazing filler metals containing at least 2% silver of AWS B-cup series are recommended. When joining copper iron tube to materials that do not contain phosphorus (which acts as a fluxing agent itself), like black steel, brazing flux is required. Additionally, you must use brazing alloys meeting AWS BAg series of 45-56% silver.
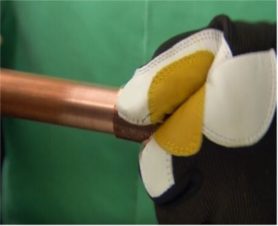
- Assemble the joint by inserting the tube into the socket hard against the stop. The assembly should be firmly supported so that it will remain in alignment during the brazing operation.
- To conduct heat into the joint space, first preheat the tube. For a horizontal joint, begin preheating the bottom 2/3 of tube for a distance approximately equal to the depth of the fitting cup. When the tube begins to darken, begin heating both the tube and the fitting cup, focusing on the bottom 2/3 of the joint.
- Heat until the fitting cup reaches the proper brazing temperature; temperatures vary by tube size and type and can be found in section 14.4a of the Copper Tube Handbook.
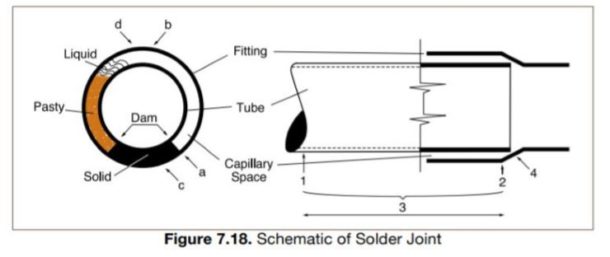
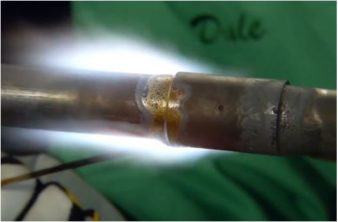
- Apply heat to the parts to be joined, preferably with an oxy-fuel torch with a neutral flame. Heat the tube first, beginning about one inch from the edge of the fitting, sweeping the flame around the tube in short strokes at right angles to the axis of the tube (Figure 7.18, Position 1 [see below]). It is very important that the flame be in motion and not remain on any one point long enough to damage the tube.
- Switch the flame to the fitting at the base of the cup (Figure 7.18, position 2 [see above]) and heat the fitting cup around the bottom 2/3rds of the joint.
- As the fitting cup rises to brazing temperatures, begin to heat both the tube and the fitting by sweeping the flame (Figure 7.18, position 3) [see above] from the fitting to the tube until both the tube and the fitting reach the temperature at which the brazing metal begins to melt when applied to the copper-iron surface. Avoid excessive heating of cast fittings, due to the possibility of cracking.
- For 1-inch tube and larger, it may be difficult to bring the whole joint up to temperature at one time. It frequently will be found desirable to use an oxy-fuel, multiple-orifice heating tip to maintain a more uniform temperature over large areas. A mild preheating of the entire fitting is recommended for larger sizes, and the use of a second torch to retain a uniform preheating of the entire fitting assembly may be necessary in larger diameters. Heating can then proceed as outlined in the steps above.
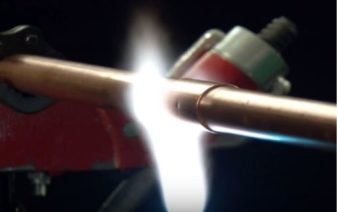
- Apply the brazing filler metal at a point where the tube enters the socket of the fitting, near the bottom portion of the assembly. When the proper temperature is reached, the filler metal will flow readily into the space between the tube and fitting socket, drawn in by the natural force of capillary action. Keep the flame away from the filler metal itself as it is fed into the joint. The temperature of the tube and fitting at the joint should be high enough to melt the filler metal.
- Keep both the fitting and tube heated by moving the flame back and forth from one to the other as the filler metal is drawn into the joint and move the flame and filler metal smoothly and continuously up one side of the joint assembly. Once you reach the top, move back to the bottom of the joint on the other side and repeat the process, overlapping filler metal addition at both the bottom and top of the joint.
- When the joint is properly made, filler metal will be drawn into the fitting socket by capillary action, and a continuous fillet of filler metal will be visible completely around the joint. To aid in the development of this fillet during brazing, the flame should be kept slightly ahead of the point of filler metal application. Inspect to make sure there is a complete fillet around the joint, if necessary you can reheat the face of the joint and add additional filler metal to complete the fillet.
- For vertical joints, the starting point (bottom of the horizontal joint) is irrelevant but the same heating and brazing process should be followed.
- Cleaning is not a requirement once the brazing process is completed. If flux was used, the residue should be removed. This can most easily be done with hot water and brushing.
- Your joint is now complete! For additional information related to brazing copper-iron alloys and copper piping in HVAC systems, check out CDA’s Copper Tube Handbook.


Copper-iron alloy’s effectiveness under high pressure distinguish it as a top material for HVAC&R applications. The development of copper-iron alloy is a huge step forward in creating piping applications that are fit for the future environment. For more information about proper installation techniques for copper-iron, check out the video: Copper-iron Piping for HVAC, Lightweight but Strong as Iron.


Join the conversation: