We have made it to the new year, a new decade. And with the turn of every calendar comes the rush of industry trade shows. Next week we will be traveling to Las Vegas for the IBS/KBIS Show or the Builder’s/Kitchen & bath Show. Following that, we will be in Orlando for the AHR Show Read more
Industry Blogs

We have made it to the new year, a new decade. And with the turn of every calendar comes the rush of industry trade shows. Next week we will be traveling to Las Vegas for the IBS/KBIS Show or the Builder’s/Kitchen & bath Show. Following that, we will be in Orlando for the AHR Show, North America’s largest HVAC show. Oh yeah, let’s not forget about World of Concrete, back in Vegas. The goal is to see, feel and test new products, learn and network with fellow attendees.
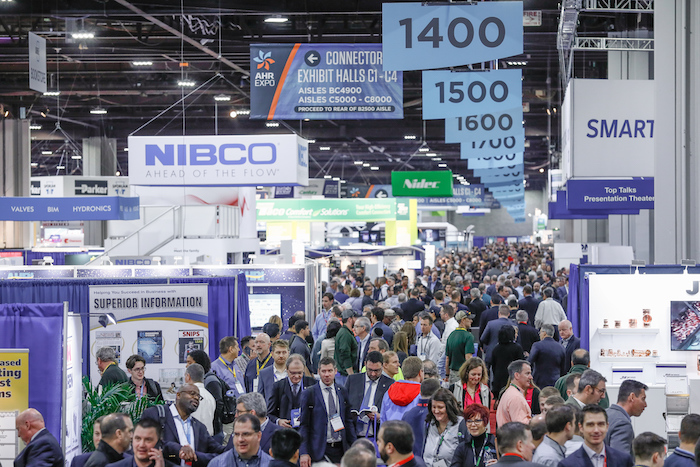
The AHR Expo is one of the largest annual North American trade shows.
When attending these trade shows, it is best to have a plan. Having attended dozens of these show in the past, I have come up with some tips and strategies for a better trade show experience.
- Map Out Your Plan — All of these shows have corresponding websites with maps, and a list of exhibitors and events. I can’t stress enough to map out your day so you are the most efficient with your time, energy and steps on the trade show floor. (ahrexpo.com & www.buildersshow.com & www.worldofconcrete.com) Downloading the appropriate trade show apps is a must.
- Wear Comfortable Shoes & Clothing — We all want to look good, and professional, but gone are the days of stuffy apparel. I’d rather feel comfortable and fresh at the end of the day than out of sorts, sweaty and dogs a barking.
- Give Yourself Enough Time — The stress of a trade show can be daunting in and of itself. Take as much time as you need to take a deep breath and move freely on the show floor. It’s always a good idea to come in the day or night before a show to make sure all is in order and registration for the show is set. If you are planning a night out, make sure you make any necessary reservations ahead of time.
- Afterparty Over-Indulging — We all love to go out and enjoy ourselves, especially after a long day at a show. There are numerous manufacturer parties, dinners, soirees, etc. where one can relax and wind down. But staying out all night—and drinking—can be fun, and up to your discretion, but it isn’t advisable, especially if you intend to be at the show the following day. Nobody is impressed with the over-perspired, alcohol lingering on breath, bags under the eyes, headache pounding visit from on overserved attendee. Pro Tip: Keep hydrated and carry a protein bar just in case you get the munchies. The IAQ in these large buildings is usually very poor and the air can get dry.
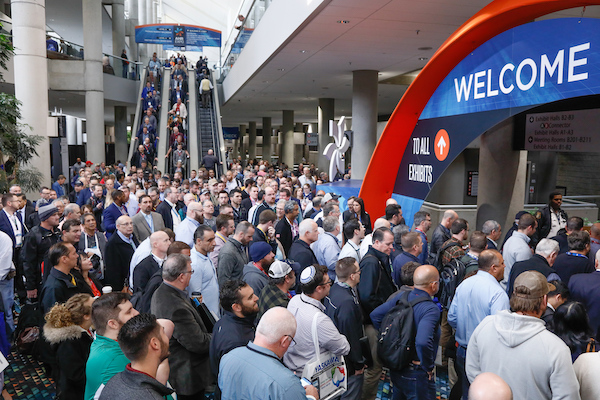
- Plan Accordingly for Transportation — Most of the time at busy trade shows, transportation can, well, be a bitch, especially after a show. Keep this in mind as long taxi lines will form to and from the shows. Download your favorite rideshare app so you are locked and loaded.
- Travel in Packs — If traveling in groups, try to stay in one place or area. It alleviates costs on transportation and makes meetings much more amenable.
- Be Prepared to Exchange Contact Info — Make sure you have business cards on hand and be prepared to exchange info digitally, so make sure your phone is charged or bring extra chargers! Also, make sure you have proper badges for the show. For example, attendee, exhibitor and press badges all provide different access and different access times. Make sure you understand the limitations of your particular given badge.
- Follow-up with Contacts — Once the show is over, what it your end game? What better way to measure the results of a show personally than to document leads, follow up with new contacts, and were you satisfied with your expectations of information, contacts and overall impressions?
- Cellular/WiFi Service — Most shows do not offer WiFi on the show floor, or if they do, it usually sucks. There are certain spots at different venues you may be able to sneak a signal, maybe. Make sure your service is covered in the areas where you are, or be prepared to go without in the dark recesses of a concrete building.
- If Unable to Attend … — Be sure to follow your favorite social media outlets that are attending (Search Mechanical Hub on Facebook, Twitter & Instagram) and keep up to date on what’s going on from the show floor. First of the year trade show events are when companies have big product announcements, launches and press briefings.
Good luck, and have a great trade show experience!

Hydronic systems outperform VRF, study finds In a study commissioned by Xylem Inc. that evaluated HVAC systems in a number of South Carolina school buildings, hydronic systems outperformed all other systems, including VRF, in terms of lower energy use, cost and life expectancy, by as much as 24%. “With HVAC systems dictating a substantial amount Read more
Hydronic systems outperform VRF, study finds
In a study commissioned by Xylem Inc. that evaluated HVAC systems in a number of South Carolina school buildings, hydronic systems outperformed all other systems, including VRF, in terms of lower energy use, cost and life expectancy, by as much as 24%.
“With HVAC systems dictating a substantial amount of the overall energy use of commercial buildings, the results shed light on the importance of evaluating varying system-to-system costs before installation,” said Kyle DelPiano, Business Development Director, CBS Market, Xylem. “More than ever, energy-efficient practices are driving the construction industry toward more sustainable solutions, and this study proves long-term cost savings that can’t be overlooked when making the choice between hydronic and VRF systems.”
To compare and contrast HVAC systems according to their 30-year life-cycle cost analysis (LCCA), the Xylem study analyzed seven elementary and middle schools located in South Carolina Climate Zone 3A, a humid, warm climate. The cost analysis included upfront installed cost, replacement cost allocations and ongoing energy and maintenance cost of the following system types:
- Variable refrigerant flow heat pumps (VRF)
- Water source heat pumps (WSHP)
- Ground source heat pumps (GSHP)
- Direct expansion rooftop units (DX RTU)
- Water cooled chillers (WCC)
- Air-Cooled Chillers (ACC)
The findings of the study revealed that the schools with WSHP, GSHP and WCC systems displayed energy use levels that were 30%, 41% and 25% better than the national median for elementary and middle schools, respectively. The replacement cost allocation also acknowledged that the tested hydronic systems operate effectively for approximately 25 years, as opposed to the 15-year replacement estimation for VRF systems.
The tested VRF systems required replacement a decade earlier because of their tendency to work harder during heating cycles, bringing proof of long-term cost savings to the forefront of the conversation surrounding sustainability and hydronic HVAC system efficiency.

Replacement allocations had an impact on the life-cycle cost analysis (see yellow bars) and drastically reduced the cost effectiveness of equipment with 15-year life expectancies.
Considerable benefits of the hydronic HVAC systems included lower energy usage intensity and cost, wider range of maintenance flexibility and longer life expectancy.
The full research study can be found here: https://bit.ly/35AtpXb. For more information about Xylem, visit www.xylem.com.
Finding and installing Heating, Ventilation, Air Conditioning & Refrigeration (HVAC&R) applications for high-pressure systems has become more difficult as international regulations have eliminated some common refrigerants. R22, for example, is set to become illegal on January 1, 2020, due to its high global warming potential (GWP). With this in mind, the industry has begun developing Read more
Finding and installing Heating, Ventilation, Air Conditioning & Refrigeration (HVAC&R) applications for high-pressure systems has become more difficult as international regulations have eliminated some common refrigerants. R22, for example, is set to become illegal on January 1, 2020, due to its high global warming potential (GWP). With this in mind, the industry has begun developing sustainable, durable tubing materials.
Some copper tubing designated for HVAC&R applications does not provide the wall thicknesses necessary to handle the temperatures and pressures of carbon dioxide systems. However, copper-iron (C19400) material offers high strength, good thermal conductivity, and great workability, making it an exceptional, sustainable tubing option for HVAC&R applications. The C19400 alloy is rated for pressures in the range of 90 bar (1,305 psi) to 130 Bar (1,885 psi) and above at operating temperatures up to 300°F, compatible with the operating ranges of CO2 refrigeration systems.
Installation Details:
Brazing techniques for copper-iron alloy are the same as those for brazed joints in standard copper and copper alloy systems for plumbing, HVACR, medical gas and other systems that require strong, leak-free, fatigue-resistant joints.
- First, measure the copper iron alloy tube accurately and precisely, so it will completely fill the socket when inserted into the fitting.
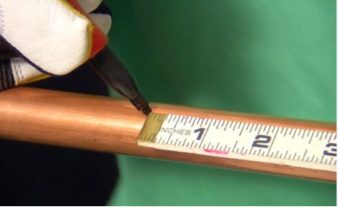
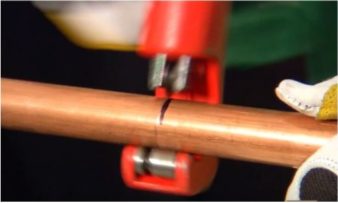
- Cut the tube square to the desired length.
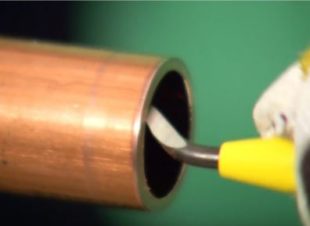
- Deburr the inside edge of the tube and chamfer the outside edge.
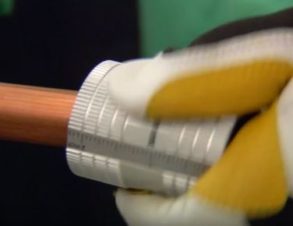
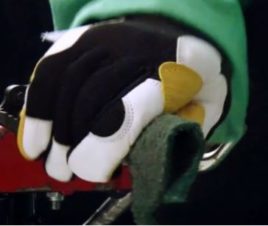
- Clean the outside of the tube and inside of the fitting cup(s) to ensure the surfaces to be brazed are free from dirt, oxides or other contaminants that can impede the flow of filler metal into the joint.
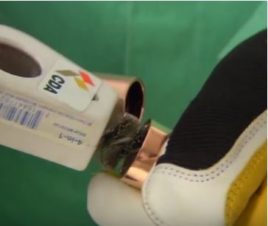
When joining copper-iron tubing/fittings to each other, brazing flux is not required and brazing filler metals containing at least 2% silver of AWS B-cup series are recommended. When joining copper iron tube to materials that do not contain phosphorus (which acts as a fluxing agent itself), like black steel, brazing flux is required. Additionally, you must use brazing alloys meeting AWS BAg series of 45-56% silver.
- Assemble the joint by inserting the tube into the socket hard against the stop. The assembly should be firmly supported so that it will remain in alignment during the brazing operation.
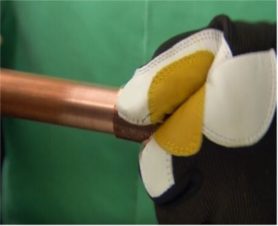
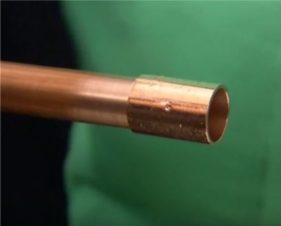
- To conduct heat into the joint space, first preheat the tube. For a horizontal joint, begin preheating the bottom 2/3 of tube for a distance approximately equal to the depth of the fitting cup. When the tube begins to darken, begin heating both the tube and the fitting cup, focusing on the bottom 2/3 of the joint.
- Heat until the fitting cup reaches the proper brazing temperature; temperatures vary by tube size and type and can be found in section 14.4a of the Copper Tube Handbook.
- Apply heat to the parts to be joined, preferably with an oxy-fuel torch with a neutral flame. Heat the tube first, beginning about one inch from the edge of the fitting, sweeping the flame around the tube in short strokes at right angles to the axis of the tube (Figure 7.18, Position 1 [see below]). It is very important that the flame be in motion and not remain on any one point long enough to damage the tube.
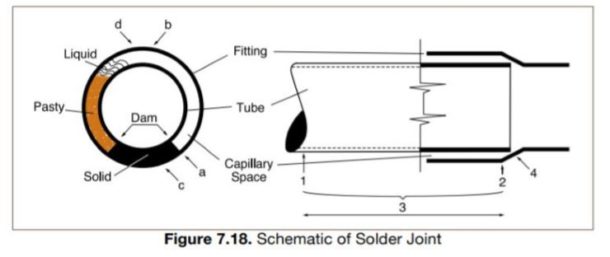
- Switch the flame to the fitting at the base of the cup (Figure 7.18, position 2 [see above]) and heat the fitting cup around the bottom 2/3rds of the joint.
- As the fitting cup rises to brazing temperatures, begin to heat both the tube and the fitting by sweeping the flame (Figure 7.18, position 3) [see above] from the fitting to the tube until both the tube and the fitting reach the temperature at which the brazing metal begins to melt when applied to the copper-iron surface. Avoid excessive heating of cast fittings, due to the possibility of cracking.
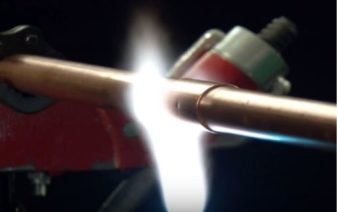
- For 1-inch tube and larger, it may be difficult to bring the whole joint up to temperature at one time. It frequently will be found desirable to use an oxy-fuel, multiple-orifice heating tip to maintain a more uniform temperature over large areas. A mild preheating of the entire fitting is recommended for larger sizes, and the use of a second torch to retain a uniform preheating of the entire fitting assembly may be necessary in larger diameters. Heating can then proceed as outlined in the steps above.
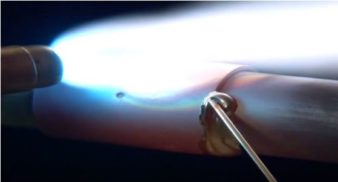
- Apply the brazing filler metal at a point where the tube enters the socket of the fitting, near the bottom portion of the assembly. When the proper temperature is reached, the filler metal will flow readily into the space between the tube and fitting socket, drawn in by the natural force of capillary action. Keep the flame away from the filler metal itself as it is fed into the joint. The temperature of the tube and fitting at the joint should be high enough to melt the filler metal.
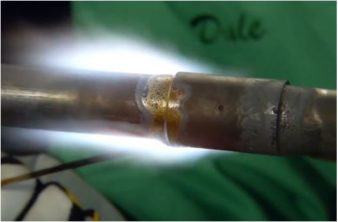
- Keep both the fitting and tube heated by moving the flame back and forth from one to the other as the filler metal is drawn into the joint and move the flame and filler metal smoothly and continuously up one side of the joint assembly. Once you reach the top, move back to the bottom of the joint on the other side and repeat the process, overlapping filler metal addition at both the bottom and top of the joint.
- When the joint is properly made, filler metal will be drawn into the fitting socket by capillary action, and a continuous fillet of filler metal will be visible completely around the joint. To aid in the development of this fillet during brazing, the flame should be kept slightly ahead of the point of filler metal application. Inspect to make sure there is a complete fillet around the joint, if necessary you can reheat the face of the joint and add additional filler metal to complete the fillet.
- For vertical joints, the starting point (bottom of the horizontal joint) is irrelevant but the same heating and brazing process should be followed.
- Cleaning is not a requirement once the brazing process is completed. If flux was used, the residue should be removed. This can most easily be done with hot water and brushing.
- Your joint is now complete! For additional information related to brazing copper-iron alloys and copper piping in HVAC systems, check out CDA’s Copper Tube Handbook.
Copper-iron alloy’s effectiveness under high pressure distinguish it as a top material for HVAC&R applications. The development of copper-iron alloy is a huge step forward in creating piping applications that are fit for the future environment. For more information about proper installation techniques for copper-iron, check out the video: Copper-iron Piping for HVAC, Lightweight but Strong as Iron.
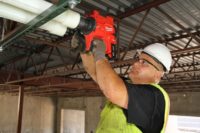
Professionals in the commercial trades who have made the switch from copper or CPVC to PEX for plumbing or mechanical piping will tell you there are four main reasons why: speed, cost, reliability and safety. Because in today’s fast paced commercial building environment, change is rapid and inevitable, budgets and schedules are tight, competition is Read more
Professionals in the commercial trades who have made the switch from copper or CPVC to PEX for plumbing or mechanical piping will tell you there are four main reasons why: speed, cost, reliability and safety. Because in today’s fast paced commercial building environment, change is rapid and inevitable, budgets and schedules are tight, competition is fierce, and skilled labor is shrinking, so keeping valuable employees safe is paramount.
The commercial industry needs a piping solution that can meet all those very important needs, and PEX delivers on every front.
Speed
Because PEX pipe is flexible to bend with each change in direction and the connections are quick to learn and even faster and easier to make, it’s a great solution to meet the skilled-labor shortage challenge and also rapidly accommodate necessary changes in the field.
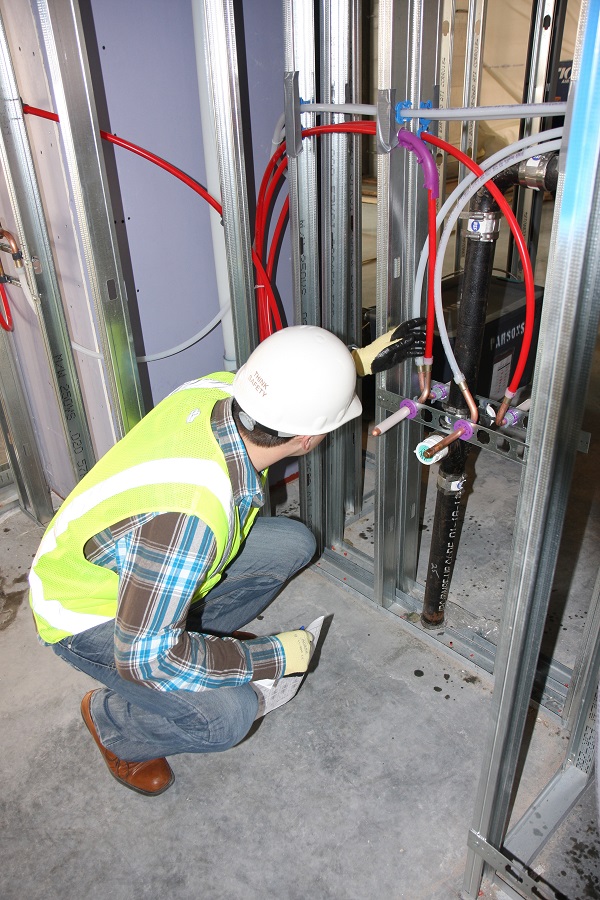
For example, a PEX piping system in an in-suite multifamily or hospitality project can reduce the number of required fittings by more than half compared to rigid copper or CPVC that require a connection with each change in direction. That can shave days or even weeks off the production schedule, depending on the project size.
Additionally, with today’s aging buildings, PEX is even more beneficial in re pipe applications where existing structures need minimal invasion for renovation (think: historical buildings).
Cost
When it comes to cost, every professional in the commercial world agrees — if the cost is attractive, but the product fails, it’s not worth it. PEX has proven to be both cost-effective and durable, a combination that makes it a win-win for engineers, building owners and installers alike.
Contractors are also finding it’s not just the material costs that are reasonable, it’s also the labor costs that PEX helps manage. Because the flexible pipe requires fewer connections (and those connections are faster and easier to make), it cuts down on labor costs in addition to the bill of material cost for the product.
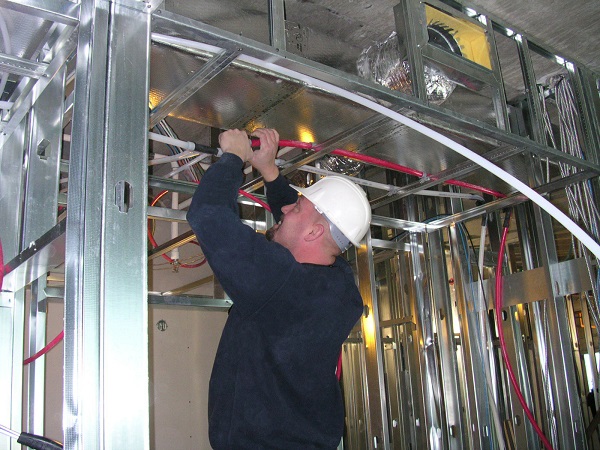
With materials costing on average up to 30 percent lower than copper, and installs taking up to half the time compared to rigid systems like copper and CPVC, PEX is proving itself to be a smart solution that installers can rely on for consistent pricing, bidding and installations.
Reliability
Every contractor has experienced a leak at one time or another, so a piping material that can help minimize leaks is a huge bonus. Take a look at all the ways PEX helps minimize potential leaks:
- Because the flexible pipe can bend with each change in direction, it reduces the number of fittings and connections and, in turn, the potential for leaks.
- With the PEX cold-expansion fitting system, it is impossible dry fit a connection. The expansion method requires the pipe to first be expanded before inserting a fitting. Then, as the pipe shrinks back down, it creates a strong connection onto the fitting. Eliminating the potential for dry fits means there’s never a concern if the connection is made.
- Flexible PEX is highly resistant to freeze damage because it can expand to accommodate frozen water in the system and then contract back down after the water thaws.
- PEX resists corrosion, pitting and scaling, so there is zero chance of leaks or performance issues due to any of these factors that can plague metallic piping systems.
Safety
With worker safety becoming a bigger issue — especially with the skilled-labor shortage — PEX offers benefits due to its lighter weight. For example, a 300-foot coil of ½-inch PEX weighs about 18 pounds, whereas the same amount of copper pipe weighs around 85 pounds.
Lighter weight means easier maneuvering around the jobsite, less strain on the body and a reduced need for cranes and heavy-lifting equipment.
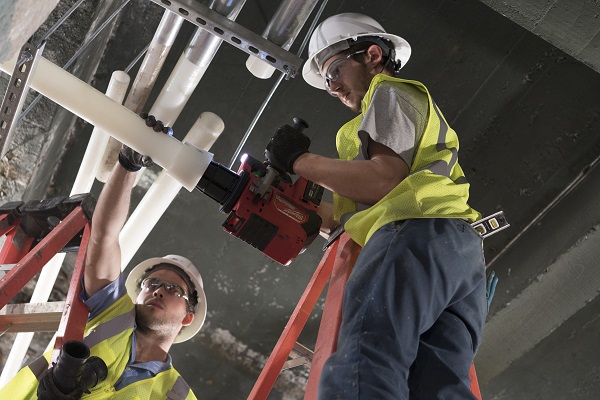
Also, because all the PEX connection methods (cold expansion, crimp, clamp, compression or push-to-connect) do not need chemicals or open flame, it greatly reduces risk on the job site and also eliminates the need and cost for fire watch requirements.
One last word of advice
Stick with one PEX system brand. Mixing brands for the pipe, fittings, sleeves or rings can greatly reduce (or even void) the warranty. You’ll have more confidence knowing you have the backing of one company if you ever have a service or warranty issue.
If you’re interested in learning more about PEX pipe and fitting systems, visit the Plastics Pipe Institute website at plasticpipe.org or the Plastic Pipe and Fittings Association website at ppfahome.org.
 Kim Bliss is the content development manager at Uponor. She can be reached at kim.bliss@uponor.com.
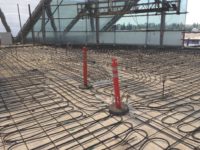
Hot water heats and cold water cools. Simple, right? But for too long, the second part of that statement has been overlooked when it comes to the use of radiant systems. Radiant heating is widely used and growing in popularity, but its counterpart, radiant cooling, has been less popular, despite its many advantages over forced Read more
Hot water heats and cold water cools.
Simple, right?
But for too long, the second part of that statement has been overlooked when it comes to the use of radiant systems.
Radiant heating is widely used and growing in popularity, but its counterpart, radiant cooling, has been less popular, despite its many advantages over forced air. And that’s despite the fact that both heating and cooling can be delivered by essentially the same system.
However, we’ve recently seen a surge in the popularity of radiant cooling as more engineers, architects, builders and consumers become aware of its comfort and effectiveness.
Anyone who’s ever worked in an office building knows the problems with forced air cooling: vents blasting cold air onto the necks of those unfortunate to sit right beneath them while others swelter in areas the ductwork doesn’t reach. Opening and closing ducts in an effort to get relief can throw the whole system out of balance while locked thermostats frustrate workers seeking relief. And, as if that weren’t bad enough, dust and allergens collect in the ductwork and are recirculated back into the air, aggravating allergies.
Radiant cooling eliminates those problems, providing even cooling and consistent temperatures without the noise and cold blasts of recirculated air and allergens. While minimal ductwork is still needed for ventilation and, in some cases, supplemental cooling, most of the work is done silently and invisibly below the floor (or in the ceiling).
Radiant cooling also is more efficient than forced air cooling, which wastes money and energy cooling ceilings and open spaces.
One barrier to the adoption of radiant cooling has been the misperception that it can’t be used in hot, humid environments for fear of condensation and the resulting slipping hazards.
However, that can be addressed through design and by setting the water to a temperature that prevents condensation. Coupling control of the humidity with control of the radiant floor, and a well-planned design, alleviate any concerns. Still skeptical? Consider this — radiant cooling is used at New Bangkok International Airport in Thailand, one of the most humid climates on earth.
Of course, correct design and building integrations are key to successful radiant cooling. Other cooling factors, such as green roofs, insulation and glazed windows, can lighten the load on cooling systems, while creating a harmonic and high-efficiency building.
While it’s easier and more efficient to design and install a dual purpose radiant system during construction, radiant cooling capability can be added afterward to an existing radiant heating system with little additional parts or labor.
With these many advantages, it’s only a matter of time before radiant cooling achieves the same prominence as radiant heating.
 Brett Austin, Manager of Design Service, has been with Viega LLC for 10 years, beginning as a radiant design technician. He holds a bachelor’s degree in mechanical engineering technology from the University of New Hampshire and is a Marine Corps veteran.
